Choosing the Right Foot Rail, Brackets, Elbows & End Caps for Your Bar

With all of the finish options and product choices available today, a foot rail is more than just a functional addition to your bar. It can dramatically enhance your bar's look and is truly a style element that garners attention. Therefore, the ideal time to start thinking about your foot rail is BEFORE you build your bar. Unfortunately, the bar foot rail is often an afterthought. Even professional designers and builders frequently delay foot rail decisions until the bar is constructed. Awareness of the types of materials available, the dimensions of brackets, recommended foot rail bracket spacing, etc. may influence your bar's design and construction. Placement of studs, molding thickness and height, pillar/stile positions will all impact and often restrict your flexibility with respect to a bar foot rail. That said, we'll share some guidelines that will help you select the right foot rail whether you have yet to build your bar, are in the midst of its construction or your bar is complete except for the foot rail.
We suggest a bracket spacing of 4'- 4 1/2' or less for your foot rail. That distance is as much a function of look as it is for support. For most non-commercial applications a spacing of up to 5' will provide adequate support but may not be visually appealing. However, bracket spacing that is too close will not be aesthetically pleasing and may interfere with finding a comfortable place at which to rest your feet. So plan for bracket spacing of 4' or so on centers. If conditions dictate going a bit further or a bit less, no worries. A little closer is better than too far apart and you'll generally want to have a minimum of 2 brackets on a side even if it is only 2' long.
Next consider the type of bracket you'll use. There are 3 basic types and some variations of each.
- Floor Mount (Mounts to the floor)
- Bar Mount (Mounts to the bar wall )
- Bar & Floor Mount (Mounts to the Bar Wall and may only rest on floor or screw to floor)
Which type you choose will be influenced by the look you're trying to achieve, the design of your bar, how you want your foot rail to function and other factors. For example, most "stock" bar mount brackets will offer flexibility of mounting height but will fix the distance of your foot rail from the bar face. Most "stock" floor mount brackets permit the distance from the bar face to be varied but fix the height of the foot rail. Finally, "stock" floor/bar mount brackets fix the height and distance of the foot rail from the bar face. At 4rails.com you have many additional options including hybrid brackets designed for your specific application.
It's important to take note of the dimensions of the various brackets. You'll want to be sure that there are no obstacles to mounting or positioning the brackets at the spots where you'll need them to be. If your tubing is spliced, you'll usually want to place brackets strategically in order to hide the seams.
The type of end cap is also a consideration. Choosing the right end cap can add a beautiful finishing touch to your foot rail. However, keep in mind that it will add length and in some cases require you to position a bracket a certain distance from the end of a tube, thus limiting your options for bracket placement.
Finally, (with respect to construction of the foot rail) decide on the type of elbow(s), if you are going to be using them. If you are connecting one or more sides, you'll want to use an elbow. Depending on the angle, you'll need a 135* or a 90* or possibly a universal angle elbow. There's also the style to consider, which is typically ball or flush. A ball elbow is exterior to the tubing and a flush elbow butts up against the tubing. If you're cutting tubing yourself, ball fittings will be more forgiving since your cuts will not be seen.
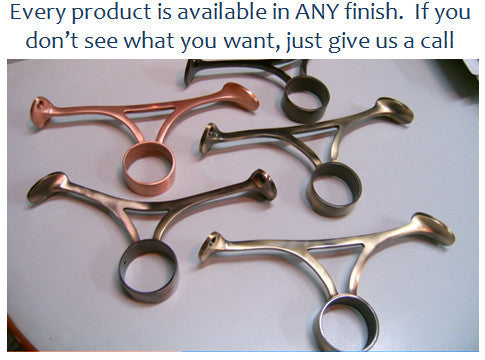
The information above details much of what you'll need to make an informed decision on purchasing the right tubing and components but you'll still need to decide on finish - perhaps the most important choice you'll make. There are antiques, standard powdercoats, Duracoats, plated finishes, metal alloys, protective coatings ... literally hundreds of options. You can find information about many of your finish options on our main menu. An advantage of 4rails.com is that you don't have to worry about restricting your selections due to the finish. Every product we offer is available in ANY finish.
Don't be overwhelmed by the myriad of options presented here. A product specialist can assist you in making the right decisions. As always, 4rails.com is the shortest distance from here to your foot rail!
Tips for Bar Foot Rails with Multiple Sides
Follow these simple guidelines and you'll be sure to order the proper amount of tubing for your foot rail.
The most important thing to remember is that when installing a foot rail for a bar with multiple sides (connected), the lengths of tubing you'll need will ALWAYS be greater than the dimensions of your bar face.
90* Rule:
For each side that connects to another, add 1" of tubing for each 1" that your foot rail will sit away from the bar face.
135* Rule:
For each side that connects to another, add 1/2" of tubing for each 1" that your foot rail will sit away from the bar face.
The two rules are a bit of an over-simplification, but that's pretty much what you need to know to order enough tubing for your foot rail. That said, let's delve into a little more detail to clarify things.
A more precise statement regarding the dimensions of your foot rail relative to the dimensions of your bar is as follows:
The point at which two sides of a foot rail intersect (relative to the bar face) is a function of its distance from the bar face.

Here's an example:
The diagram above shows an "L" shaped bar. That is, the two sides of the bar are at 90 degrees relative to one another. Notice that the foot rail (the thicker black line) has two sides as well. However, you can see that the lengths of each side of the foot rail are longer than the lengths of each side of the bar. But how much longer? Well, for a 90 degree angle like the one in the diagram, the foot rail center line (the center of the tubing), will be 1" longer on each side than the corresponding bar length, for each 1" the foot rail sits away from the bar.
Plain English explanation:
The most common mounting bracket, the 2" combination bracket, will hold the tubing approx 6" on center from the bar face. So when using a 2" combination bracket, the point at which the foot rail sides will intersect is 6" longer than the bar face dimensions.
Other considerations:
In our diagram example, if you were joining the two sides by mitering and welding the tubing at the corner, the center lines of each side will be exactly 6" longer than the bar face, if the foot rail is 6" on center away from the bar face. However, a more common method of connecting sides is through the use of "elbow" fittings like the ones below.

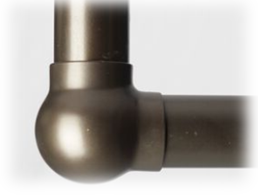
Each of these fittings will reduce the amount of tubing you'll need by different amounts. In addition, the type of end caps you select will also reduce the amount of tubing you'll need by varying amounts. Therefore, if you use the rules we've provided to order tubing, you'll always have just a little more than you'll need.
Hopefully, these basic guidelines will help you decide how much tubing you'll need to order for your particular application. However, before ordering you should be sure that you have a complete understanding of the concepts we've illustrated. This guide is provided only as a reference.
If you want to be sure to order most efficiently, a far simpler method is to speak with one of our product specialists. We'll explain your options and assist you with purchasing the right products for your needs.
Don't necessarily purchase your foot rail based on preconceived notions of what a foot rail looks like. While we'd love for you to make your purchase sooner than later, spending a little time investigating your options may prove worthwhile. For example, consider mixing finishes. Perhaps you haven't thought of using contrasting or complimentary colors. That is, different finishes for the brackets or elbows and the tubing. How about using square elbows with round tubing? 4rails.com has more product choices and more finishes, so give some thought to exploring all we have to offer. This website and our product specialists can help you create a unique foot rail that will be much, much more than just a place to rest your feet.
Save Time!
A product specialist is waiting to assist you. 877-747-2457